
3. Create a Fistbump & Add Host Group
Create your first Fistbump (e.g. workout, event, meetup) and add your Ruck Club as a Host Group.
This will let visitors see events your Ruck Club is hosting!

Step 1: Tap the fistbump icon
From anywhere in the map, you can create a fistbump by tapping the green fistbump icon at the top of your screen.

Step 2: Tap “Create Fistbump”
You can access this top menu anywhere within the app.

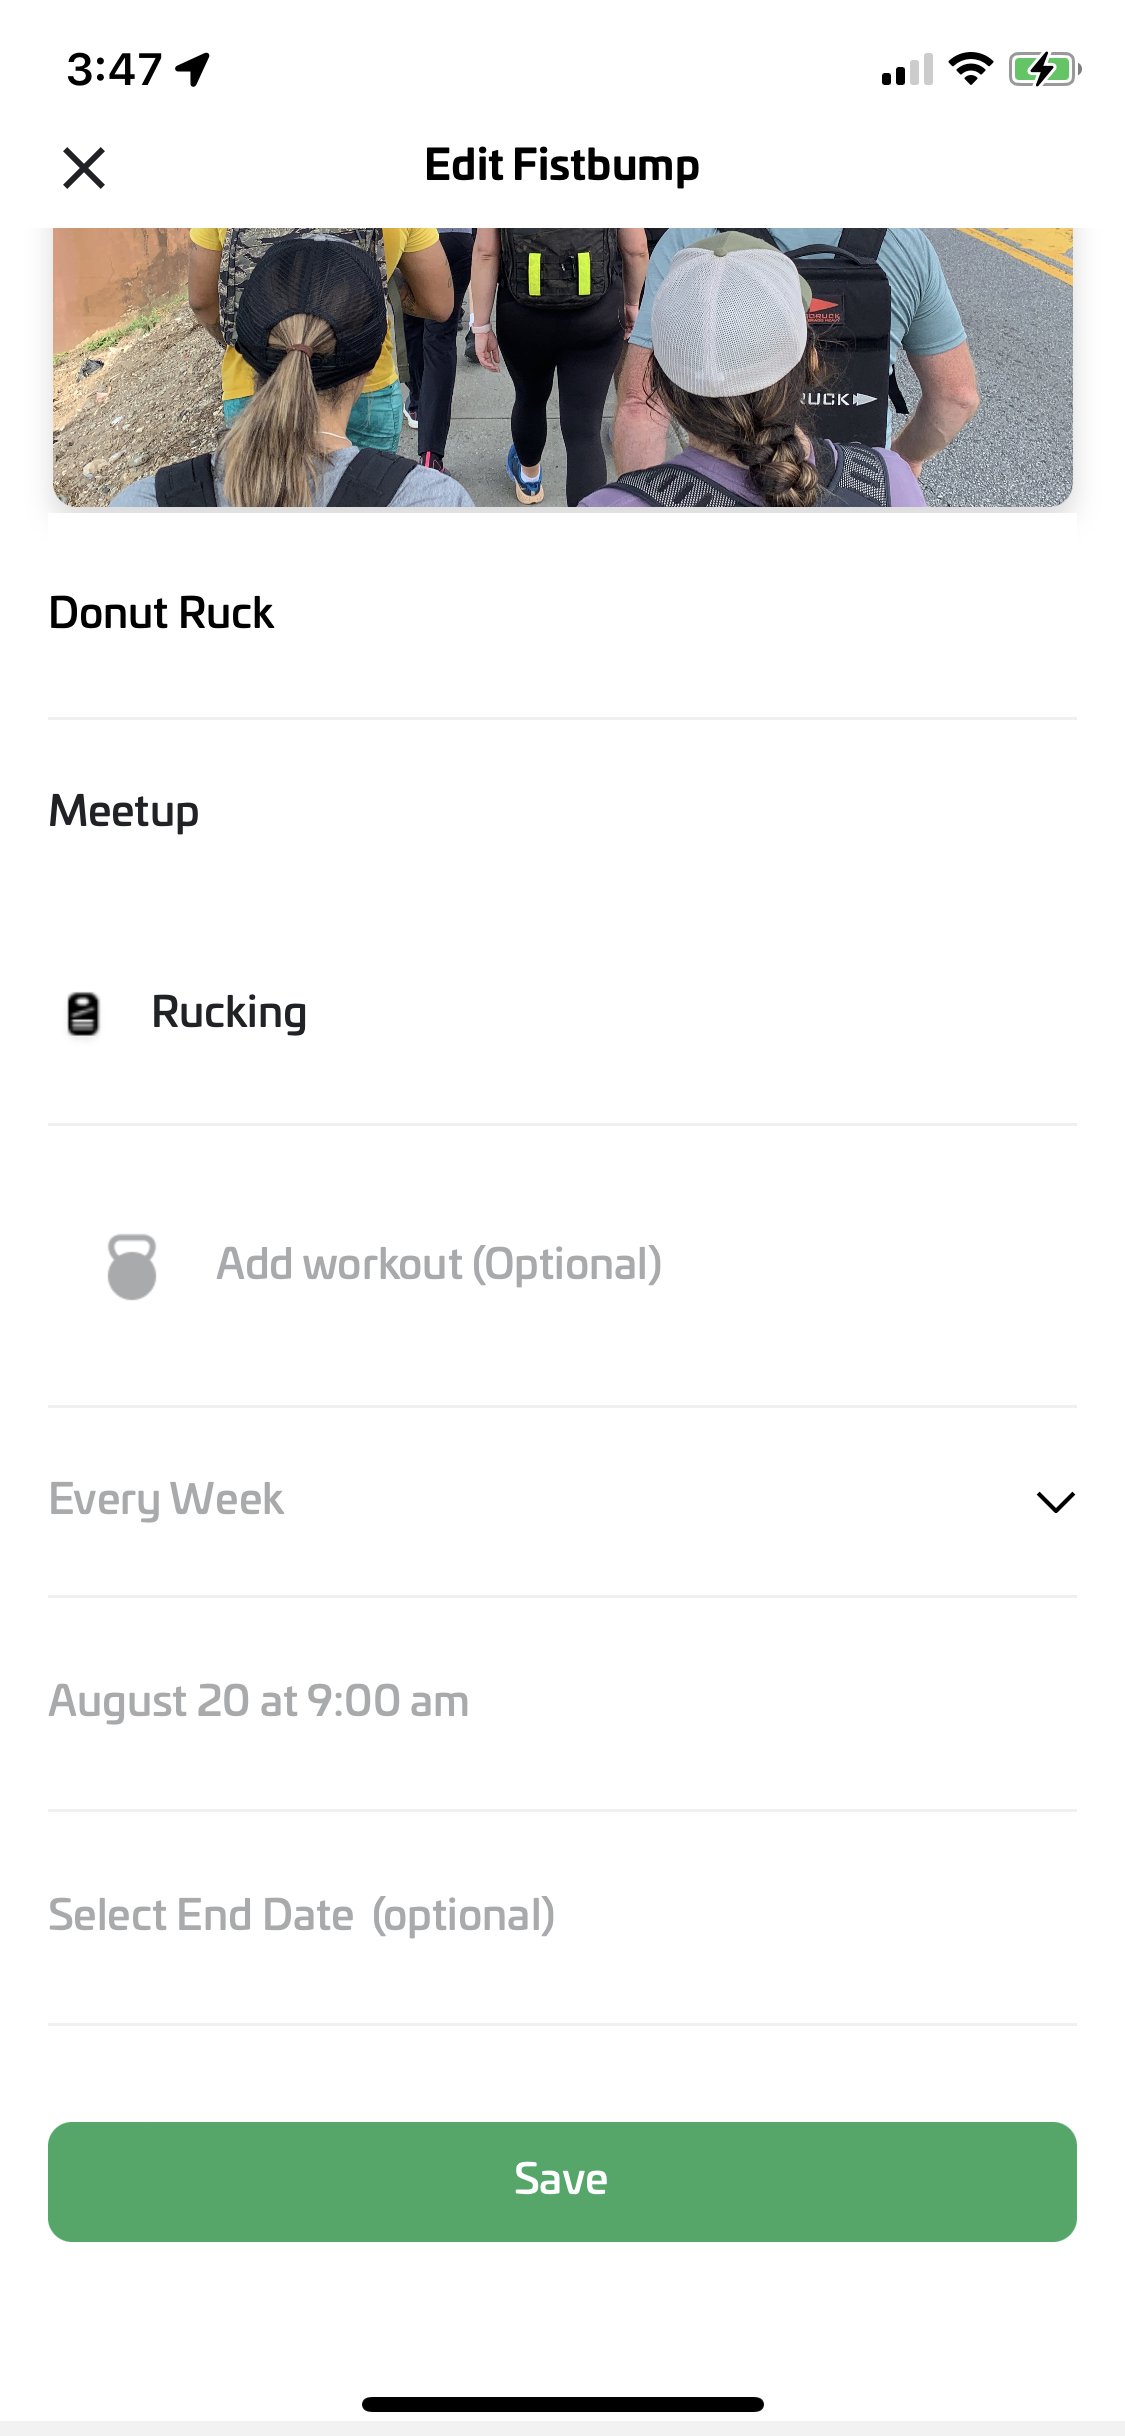
Step 3: Add Fistbump info
Ruck Clubs need to have one “RECURRING” Fistbump on the map. Instead of “Does not repeat” - choose “Weekly”.
You can do these at parks or your driveway. Make it work for you. Monthly does not function perfectly yet because it would repeat on the same date of the month. So if you wanted to program a Fistbump for the first Saturday of every month, that is not available YET.
WEEKLY is the way to go.
Step 4: Tap the Create button
Once you’ve added all the necessary info, tap the “Create” button to proceed.

Step 5: Invite Friends
On this screen, you can invite friends on the first tab, and Groups on the second tab. Tap to switch between them.
You can see here that we can invite our friend Anna as a Leader or a Member (participant). Leaders can edit the fistbump, including canceling it.
We can simply tap Leader or Member to invite her.

Step 6: Add Host Group (your ruck club)
After you’ve invited your friends, tap on the Groups tab to invite other Groups and add your ruck club as a Host Group.
In this example, we’ll be adding our Ruck Club called “630RUCKERS” as our Host Group.
We can simply tap Host or Member to invite the group.

Step 7: Tap Done
You will see the detail page for your fistbump.
Here, you can see the Host Group we just added under the Organizers header.